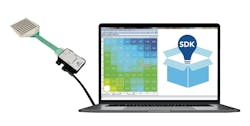
Pressure-mapping system can check alignment, deflection
PM64 Tekscan’s PM64 is a basic pressure-mapping system used to measure interface pressure between any two surfaces. It works with a variety of machinery, including injection molding machines, extrusion lines, thermoformers or ultrasonic plastic welders, to check proper alignment of machine components. It can also measure alignment and deflection of nip rolls under load by using additional sensors and attaching the PM64 to each sensor in turn.
What’s new? The PM64 and its starter kit, which includes one ultra-thin pressure sensor with 64 measuring points set in an eight-by-eight grid, the PM64 electronics unit, I-Scan R&D software, and the Pressure Mapping software development kit.
Benefits Simple, cost-effective pressure mapping. Its price point makes it practical for a company to invest in units for multiple production sites, standardize its setups and avoid flash, waste and out-of-spec product. It can be used instead of feeler gauges or other alignment tools, which can’t account for deflection, and captures a record of the readings that can be compared with digital analysis tools.
Tekscan Inc., South Boston, Mass., 617-464-4500, www.tekscan.com
Vital statistics | |
| Sensor linearity | Plus or minus 3 percent |
| Sensor repeatability | Plus or minus 3.5 percent |
| Temperature operation range for sensors | Minus 40 degrees Fahrenheit to 140 degrees Fahrenheit |
