Special Report: Firms advance nondestructive measurement of pipe, tubing
Efficient, nondestructive inspection and testing of extruded pipe and tubing for quality control has become increasingly important to processors for both cost and time savings. Companies have developed equipment to meet those requirements.
FocalSpec Inc.
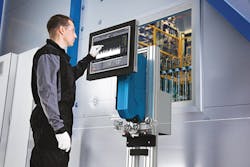
FocalSpec Inc., Cumming, Ga., introduced its MicroProfiler MP 900 in October at the IWCS International Cable Connectivity Symposium in Providence, R.I. The compact system provides inline, real-time measurement of surface roughness of extruded tubing and cable, and is suited for use with a wide range of product diameters, materials and colors, including opaque, semitransparent and transparent products.
"This new system is the only one on the market that can measure surface roughness from moving tubing while the extruder is in operation," said Cheryl Hayek, business development manager for FocalSpec.
Using patented wavelength technology, the shock- and vibration-resistant device directly scans the 3-D profile of the tubing surface and calculates and reports roughness levels. "All other methods are sampling-based contact methods that require cutting a sample from the extrudate and manual measurement in the QC lab," she said. The MicroProfiler MP 900 provides nanoscale laboratory accuracy at production speeds, and is easy to calibrate and maintain, according to the company.
With the plug-and-play system, every inch of the extruded tubing is measured on lines with speeds of up to 500 feet per minute. Real-time visual and/or audible alarms enable manufacturers to run their extruders "at the edge" at the maximum screw speeds possible, while maintaining quality parts, Hayek said.
All measuring results are stored in the integrated database, which gives users access to reports that can be used internally in shift reporting or externally as quality certificates. Users of the MicroProfiler MP 900 can also remotely access and generate reports via local area networks (LAN).
FocalSpec also recently introduced its 3D Line Confocal Imaging (LCI) sensors, which are suited for measuring tubing, medical devices and other products. The company is targeting systems integrators as a key market for the sensors, which can be integrated into both inline and stand-alone 3-D scanning systems.
The noncontact sensors are able to quickly and precisely measure reflective, transparent, porous and high-contrast surfaces and materials, according to the company. They are able to simultaneously scan 2,000 3-D surface points and provide resolutions of up to 100 nanometers at a maximum scanning rate of 2,500 scans per second. The LCI sensors provide measurement of surface profiles, dimensions, roughness, layer thickness and surface melt fracture.
Sikora AG
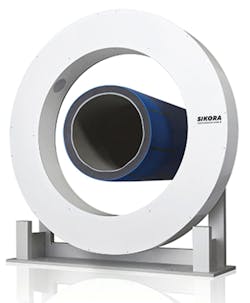
Technology that uses millimeter waves, which correspond to the extremely high frequency (EHF) range of the radio spectrum, is a relatively new method for measuring extruded pipe and tubing inline, said Harry Prunk, executive board member of Sikora AG, Bremen, Germany. The technology can be used with extrusion lines that produce large plastic pipes with diameters of 4.7 inches to more then 8 feet. Applicable for different material types, the millimeter wave technology precisely measures product dimensions as well as sagging.
Sikora developed the technology with Germany's Fraunhofer Research Institute for High-Frequency Physics and Radar Techniques and the South German Institute for Plastics. Curved product surfaces, as well as wall thicknesses of multilayer tubes, are determined and precisely measured, according to the company. The technology can provide measurements with an accuracy of within a few micrometers.
Sikora's contactless Centerwave 6000 measurement system uses the millimeter wave technology to measure inner and outer diameter, ovality, wall thicknesses and sagging during the extrusion process. It does not need any coupling media and is not affected by variables such as temperature and material, Prunk said during an interview at the K show. All measuring results are displayed in real time, with a connected processor system offering a numeric visualization of the measuring values and their graphical display, as well as extensive trend and statistical functions.
Centerwave 6000 is suitable for use with smooth, foam or corrugated pipes made of various plastic materials, including PE, HDPE, PP, polyamide 6, and PVC, according to the company. The application spectrum includes the measurement of single and multilayer tubes. The machine does not need to be calibrated. A subsidiary, Sikora International Corp., Peachtree City, Ga., represents the company in the U.S.
Angle Systems
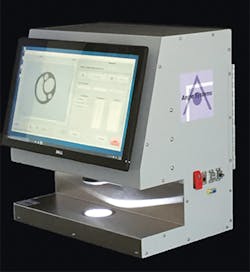
Angle Systems LLC, San Jose, Calif., provides another way of measuring tubing wall thickness with its machine-vision technology, the Multi Lumen Vision System (MLVS), which it launched earlier this year. The versatile MLVS uses a high-resolution camera for offline measurements on the production floor for quality assurance, as well as in a lab environment.
Because it reduces operator intervention, the system provides increased accuracy. "We can do all measurements within 10 seconds because we have a proprietary method and no moving parts," President Ananda Mysore said. The system's capabilities include measurements for inner and outer diameter; area; minimum, maximum and average wall thickness; and concentricity of multi-lumen and multilayer tubing.
The benchtop system — which has fixed magnification, a high-resolution industrial camera, computer-controlled lighting and a touch-screen monitor — requires minimal operator interaction. Its software provides a powerful, user-friendly operator interface and automated measurements, in both Imperial and metric units. The MLVS can provide digital quality records and printable audit sheets, according to the company.
Lisa Jo Lupo, correspondent
Contact:
Angle Systems LLC, 408-549-1644, www.anglesystems.com
FocalSpec Inc., 770-713-0837, www.focalspec.com
Sikora International Corp., 770-486-1233, www.sikora.net


