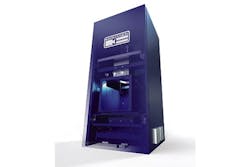
New InspecVision system can scan flat, 3-D objects
Accuity Using an 18-megapixel camera, telecentric light source and high-definition projector, this optical automated gauging system from InspecVision can perform scans of both flat and 3-D objects; by comparing the scans against CAD models, the system can identify geometric part-quality issues. After the system has scanned a part, it projects any errors back onto the part in color in a process the company refers to as "augmented reality." It takes 0.1 second to perform a 2-D scan; 3-D scans take about 10 seconds.
What's new? The system, which was introduced in May.
Benefits Rapid setup, compatibility with other automation and extreme accuracy. To prepare to scan new parts, Accuity extracts the proper dimensions and tolerances from CAD files and embeds important data within a bar code; it also prepares the "augmented reality" projections of green and red that signify good and bad parts. This entire process, which can take hours using other systems, requires just a few seconds. Accurate to within 6 microns, the Accuity can scan items as wide as about 4.7 inches. It can be easily programmed to work with external systems, such as robots, so that good and bad parts are properly sorted once identified. The system is designed to compensate for variances in object orientation or distance.
InspecVision Ltd., Mallusk, Northern Ireland, 44-2890-844-012, www.inspecvision.com

