Smarter software bolstering quality-control efforts
While new cameras and other quality control/inspection hardware can detect flaws and poor quality in plastic parts, products and film, software is the brains of any quality-control effort, helping to interpret what the hardware detects and, in some cases, automatically alerting users to issues. Several suppliers make software that can be used in combination with third-party hardware; their technologies can help users compare actual parts against the designs.
ATS APPLIED TECH SYSTEMS
ATS, which makes industrial, process and information technology software, released an updated inspection package, ATS Inspect 6.0, earlier this year. It is designed to prevent poor-quality products from leaving the plant, increase product quality and reduce warranty claims. Injection molders are among the manufacturers that can benefit from using it.
With the software program, manufacturers can archive reference models of good parts. During inspections performed either manually or by robots, operators can compare parts to the reference models and record any defects they find.
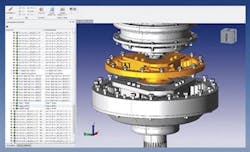
Featuring an improved, more user-friendly interface, ATS Inspect 6.0 includes numerous upgrades. According to the company, users now can enter defects directly onto imported 3-D CAD models of the product; the models provide better definition than JPEG images. They also can use the software to display model parts and assemblies by segments or 2-D layers. These new features better enable users to precisely pinpoint defects against the reference images.
In addition to greater functionality for defect recording, ATS Inspect 6.0 also has been updated so users can create reports more easily. It includes electronic checklists, where users can make notes about quality issues.
The system tracks every manufactured part, recording data about its location and travel history, how it was made and the inspection process. This can help users identify patterns and determine, for instance, which stations or shifts are correlated with particular defects. With this traceability, users can identify when and where problems arose and guarantee no other products were affected.
ATS Inspect 6.0 alerts team members of the current quality of parts throughout the plant with scheduled updates and quality-issue alerts via eâ€mail, message boards and overhead monitors.
FARO
A designer of measurement software for manufacturers, Faro recently unveiled Faro Visual Inspect, an app that enables users to move large, complex 3-D CAD data to an iPad so technicians on the shop floor can easily compare manufactured parts to electronically stored reference models.
Technicians can use text and images to document any potential issues with inspected items, and can then export everything into a Microsoft file.
Customers can choose from a pair of Visual Inspect options:• Visual Inspect enables intuitive mobile viewing, verification and documentation of complex 3-D data.• Visual Inspect AR enables complex 3-D data to be overlaid and compared to actual data in real time. The module provides virtual markers, providing the ability to overlay 3-D data, including all process and workflow information, on the image.
Faro touts the app's user-friendly setup, which requires just three steps:• Download the iPad application from the Apple's app store,• Calibrate the iPad, and• Activate the application with the calibration file.
INNOVMETRIC SOFTWARE
InnovMetric is offering the latest version of its 3-D software, PolyWorks 2017.
Updates to the software package, which is compatible with CNC coordinate measuring machines, make it easier for firms to share data among employees, customers and suppliers.
PolyWorks includes PolyWorks Inspector, a 3-D metrology program for recording reference and actual part dimensions, and PolyWorks Talisman, an app that allows technicians to perform measuring tasks on the shop floor. To view and share 3-D images, InnovMetrics provides its free PolyWorks Viewer, which allows users to extract information from a measurement database.
Conversion from 3-D inspection to 2-D reports is challenging and inefficient, so the PolyWorks Inspector 3-D metrology software enables measurement specialists to communicate results and produce reports directly in 3-D with the new Control Reviewer. With it, users can:• Access a global list of dimensional controls sorted by characteristic index, making it easier to prepare first-article inspection reports.• Add custom controls to the global list of controls, such as those measured using manual gauges.• Tie individual controls to specific data alignments and coordinate systems, enabling multi-contextual control views.• Search, sort and filter controls to highlight critical results.• Display control views automatically in 3-D with the right point of view.• Generate formatted reports automatically.
Upgrades to PolyWorks also include the addition of real-time collision analysis.
Phillip Britt, correspondent
For more information
ATS Applied Tech Systems LLC,Rochester Hills, Mich., 248-406-4800, www.ats-global.com
Faro,Lake Mary, Fla., 407-333-9911, www.faro.com
InnovMetric Software Inc.,Quebec City, Quebec, 418-688-2061, www.innovmetric.com


